Furniture Maintenance and Repair

Butcher Block Oil

Return

*What Finish Would You Recommend for a Butcher Block Counter Top?

It depends on the type of use you plan for your butcher-block top and the look you want.

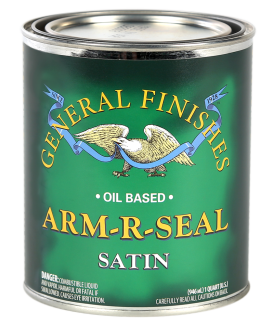
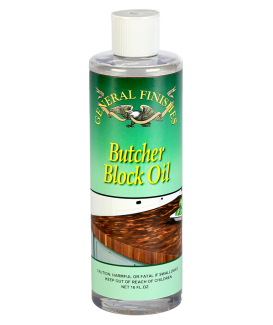
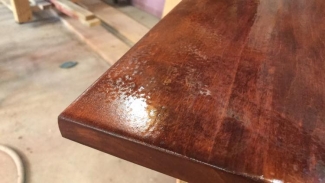
If it is a statement piece and not intended for high use, almost any finish would work. General Finishes Arm-R-Seal Topcoat is a good choice. If you intend to prep or chop food General Finishes Butcher Block Oil should be applied.

However, neither product will withstand continuous water use or standing water, or hold up to knife cuts. We always use a cutting board just as we would on a standard kitchen counter. Basically, all horizontal wood surfaces in a kitchen must be maintained, and will easily wear with high water use.

Differences:

  • Butcher Block Oil is a maintenance product that should be reapplied over time. It has a lovely matte finish that soaks into the wood and is an excellent protectant for wood surfaces that come in contact with food. Simply wipe on, allow 5 minutes to penetrate and wipe off the excess. It can also be used on cutting boards, utensils, or bowls. It is one of our most popular finishes for butcher-block counters.
     
  • Arm-R-Seal is a fine furniture finish, offers several levels of sheen and is a durable finish. It has been successfully used on home bar projects with this caveat: no fine furniture finish is impervious to water. Spills must be wiped up in a timely manner.

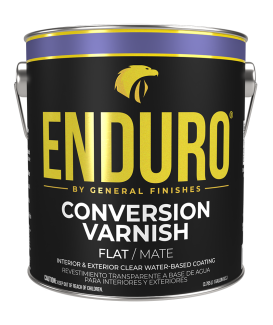
For a more water-resistant finish, we recommend visiting a finish dealer that carries lines specifically designed for high water use such as an Epoxy or a professional two-step catalyzed finish such as General Finishes Conversion Varnish.

Related Categories


What Finishes & Coatings does General Finishes Offer for Retailers, Homeowners and DIY??

General Finishes offers water, oil, and maintenance finishes that meet the needs of homeowners, woodworkers, and DIY’ers. Comprehensive videos are available for each product on YouTube, plus dynamic comparison charts at GeneralFinishes.com/COMPARE.

All General Finishes water-based finishes are:

  • VOC compliant in all 50 states
  • Water cleanup 
  • Low odor
  • Non-flammable
INTERIOR PRIMERS

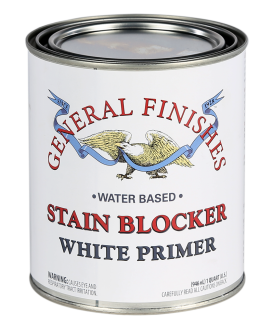
Water Based Stain Blocker is:

  • An epoxy acrylic formulation.
  • Prevents tannin bleed-through & discoloration.
  • Has high build with excellent adhesion properties.
  • Apply with a brush, roller, or sprayer.
WATER-BASED TOPCOATS & PIGMENTED FINISHES

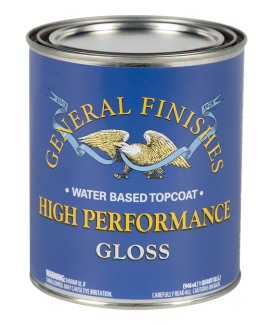
High Performance Water-Based Topcoat is:

  • An Interior polyurethane/acrylic blend.
  • Clear drying.
  • highly resistant to water and household chemicals.
  • Apply with a brush or sprayer.

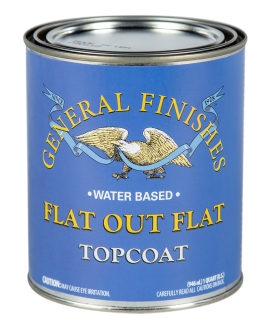
Flat Out Flat Water-Based Topcoat is:

  • An interior acrylic formulation.
  • Clear drying.
  • provides an extremely flat finish with high durability.
  • Apply with a brush or sprayer.

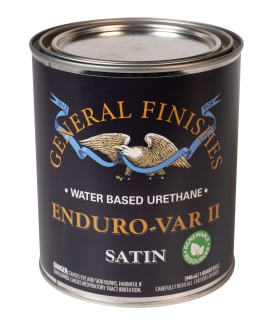
Enduro-Var II Water-Based Topcoat is:

  • An interior oil-modified water-based urethane.
  • Dries to a light, amber tone.
  • Made with over 50% renewable resources.
  • Apply with a brush or sprayer.

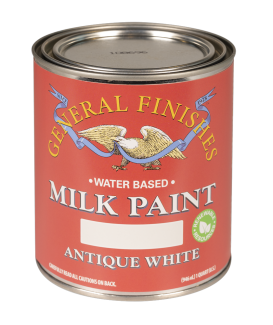
Water-Based Milk Paint is:

  • A premium interior and exterior-rated acrylic formulation.
  • Self-sealing and does not require topcoat.
  • Is made with over 50% renewable resources.
  • Is available in 12 popular colors, plus two tint bases.
  • Apply with a brush, roller, or sprayer.

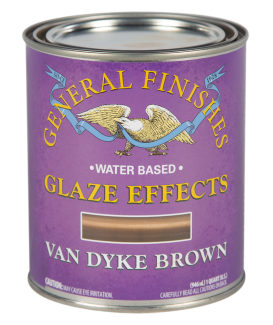
Water-Based Glaze Effects is:

  • An interior oxidating acrylic formula.
  • Available in 6 colors, including a Clear Base.
  • Is a decorative specialty finish.
  • Can be intermixed to create custom colors.
  • It requires a topcoat
  • Apply with a brush, roller, or sprayer

Pro Image Water-Based Flooring Topcoat is:

  • An interior polyurethane.
  • Clear drying.
  • Levels to a smooth, hard, durable finish.
  • Provides excellent slip and black heel mark resistance.
  • Apply with a brush, roller, or pad applicator.
INTERIOR WATER-BASED STAINS

Water-Based Wood Stain is:

  • Made with over 50% renewable resources.
  • It’s available in 18 deep brilliant colors.
  • And provides universal coverage on many wood species.
  • Apply with a brush or sprayer.

Water-Based Pre-Stain Conditioner is:

  • Used to control blotching on hard-to-stain woods.
  • And to reduce Water Based Wood Stains.
  • Apply with a brush or sprayer.

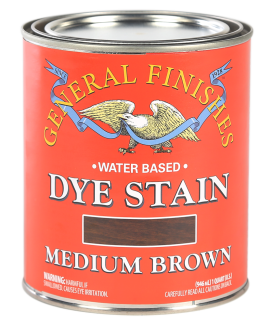
Water-Based Dye Stain is:

  • A penetrating stain with ink-like consistency.
  • It is available in 14 vibrant colors.
  • And can be used as a toner.
  • Apply with a brush or sprayer or wiping on.

Water-Based Dye Stain Reducer is:

  • The clear base used to reduce Dye Stain colors.
WATER & OIL EXTERIOR FINISHES

Exterior 450 Clear Water-Based Topcoat is:

  • A polyurethane formulation.
  • Tintable to dark colors.
  • Contains UV absorbers & Mildewcides to protect the finish.
  • Clear drying.
  • Apply with a brush or sprayer.

 450 White Water-Based Topcoat is: 

  • A pigmented polyurethane formulation.
  • Is tintable to light and pastel colors.
  • Contains UV absorbers & mildewcides to protect the finish.
  • Apply with a brush, roller, or sprayer.

Exterior 450 Water-Based Stain is:

  • Made with over 50% renewable resources.
  • Available in 10 colors, including a clear base.
  • Contains U.V. absorbers & mildewcides to protect the finish.
  • Apply with a brush or sprayer.

Water-Based Milk Paint is:

  • A premium Interior and exterior-rated acrylic formulation.
  • Self-sealing and does not require topcoat.
  • Made with over 50% renewable resources.
  • Available in 12 popular colors, plus two tint bases.
  • Apply with a brush, roller or sprayer.

Outdoor Oil is:

  • A penetrating oil wood preservative.
  • Contains UV absorbers and mildewcides to protect the finish.
  • This finish will amber as it ages.
  • A maintenance product. Reapply when wear becomes evident.
  • Apply with a brush, roller or sprayer.
INTERIOR OIL STAINS & AMBERING TOPCOATS

Gel Satin Oil-Based Topcoat is:

  • A heavy-bodied, no-drip oil and urethane formula.
  • Designed to provide a hand-rubbed look.
  • Will amber as it ages.
  • Apply with a brush or wipe on.

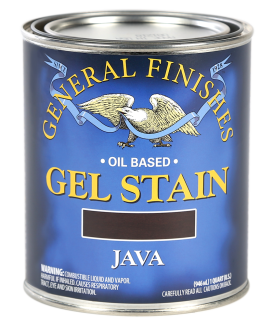
Gel Oil-Based Stain is:

  • A heavy-bodied, no-drip formula.
  • Available in 14 deep, rich, uniform colors.
  • Apply with a brush, roller, or wipe on.

 Arm-R-Seal Oil-Based Topcoat is:

  • A penetrating sealer with a high-quality urethane formulation.
  • It provides long-lasting, durable protection.
  • and works beautifully on projects with detail.
  • This finish will amber as it ages
  • Apply with a brush or wipe on.

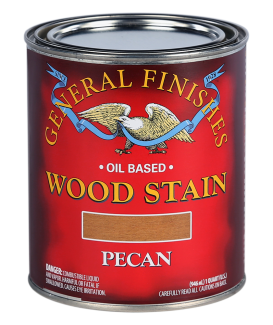
Liquid Oil-Based Wood Stain is:

  • a traditional, pigmented liquid wiping stain
  • Available in 14 colors
  • Can be used as a toner with Arm-R-Seal
  • Apply with a brush or wipe on.

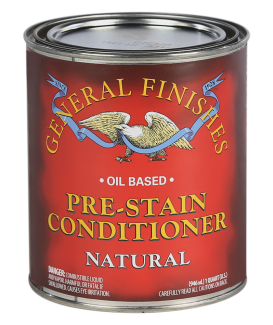
Oil-Based Pre-Stain Conditioner is:

  • Designed to control blotching on hard-to-stain woods.
  • And penetrates the grain to promote uniform acceptance of oil stains.
  • Apply with a brush or wipe on.

Oil-Based Seal-A-Cell Clear is:

  • Formulated with a blend of oils, urethanes, and wax.
  • Is GF’s deepest penetrating close-to-the-wood sealer.
  • And the best choice for highlighting figured wood.
  • Apply with a brush or wipe on.

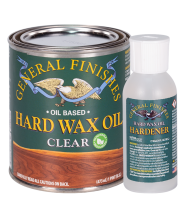
Hard Wax Oil is:

  • A urethane-solids polymer in a blend of oil & wax.
  • Enhances the natural look of wood.
  • One of our easiest finishes to use.
  • It’s best used with optional GF Hardener to shorten dry time and provide superior durability.
  • This is a maintenance product. Reapply when wear becomes evident.
  • Apply with a white pad or plastic spreader.

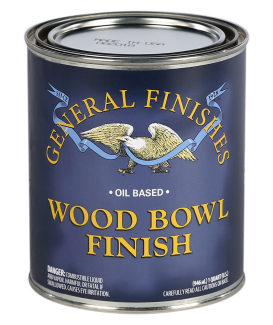
 Oil Based Wood Bowl Finish is:

  • A pure urethane formulation.
  • Highlights figured wood beautifully
  • Apply with a brush or wipe on.
INTERIOR MAINTENANCE PRODUCTS

Butcher Block Oil is:

  • A mineral oil formulation.
  • Meets all requirements for use on wooden surfaces that come in contact with food.
  • This is a maintenance product. Reapply when wear becomes evident.
  • Apply with a cloth.

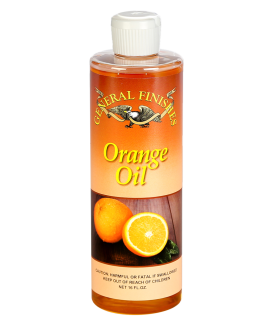
Orange Oil is:

  • A routine cleaner for cured wood finishes
  • Non-combustible with a fresh orange scent
  • Apply with a cloth

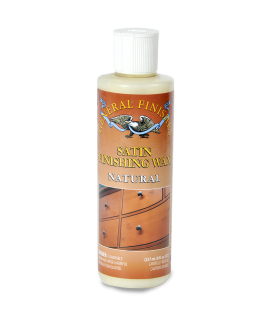
Satin Finishing Wax is:

  • A blend of waxes.
  • Produces a soft sheen and feel over any wood finish.
  • Can be used as a polish for rubbing out new finishes OR as a scratch-remover.
  • Apply with a cloth.

No matter what your project is, General Finishes has the right product for you. General Finishes is dedicated to using the highest-quality ingredients in all our products, while testing and advancing our water-based finishes with leading-edge technology.

Learn more about GF’s products at Generalfinishes.com. 

General Finishes: We make tomorrow's finishes today.


Related Categories


Orange Oil

Return

*How Should I Clean My Finished Project?

After your finish has cured, the best way to clean is with a water-damp rag. If your surface requires deep cleaning due to grease or grime build-up, add a speck of a strong dish detergent, such as Dawn or a bit of vinegar to your damp rag.

If need deeper cleaning, use General Finishes Orange Oil Polish.

Avoid using oil-soap or silicone-based daily cleaners or dusting sprays These products and the chemicals in other cleaners can contaminate your finish, preventing adhesion of future finishes. 

NOTE: Do not clean furniture until the finish has cured completely. 

Cure Time Guidelines: 

  • Water Based Finishes: 21 days
  • Oil Based Finishes: 30 days 

Related Categories


*Can I Use Orange Oil To Rub or Buff a Finish To a High Gloss?

Rubbing or Buffing out a Finish:

  1. Shake container well.
  2. Wipe on a thin, even coat with a clean cloth.
  3. Let sit 1-2 minutes.
  4. Buff off the excess with a buffing or sanding pad (see below) in the direction of the wood grain. The higher/finer grit you use, the easier it will be to achieve a high-gloss finish.
  5. Buffing Tools:
    1. Norton Abrasives, Yellow Block
      • 1000-grit, 1500-grit, 2000-grit
      • Creates a high-gloss finish
    2. Klingspor Fusion Pads
      • 2800- to 3500-grit
      • Ideal for painted and gloss finishes
    3. Klingspor Superfine Sanding Pad
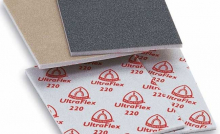
      • 220-grit
      • General purpose option for rubbing out topcoats and paints with a flat or satin sheen.
    4. Merka Mirlon Pads
      • Total 1500 (gray)
      • Total 2500 (gold)
      • Ideal for oil-based finishes or between coats of paint

Related Categories


What Finishes & Coatings does General Finishes Offer for Retailers, Homeowners and DIY??

General Finishes offers water, oil, and maintenance finishes that meet the needs of homeowners, woodworkers, and DIY’ers. Comprehensive videos are available for each product on YouTube, plus dynamic comparison charts at GeneralFinishes.com/COMPARE.

All General Finishes water-based finishes are:

  • VOC compliant in all 50 states
  • Water cleanup 
  • Low odor
  • Non-flammable
INTERIOR PRIMERS

Water Based Stain Blocker is:

  • An epoxy acrylic formulation.
  • Prevents tannin bleed-through & discoloration.
  • Has high build with excellent adhesion properties.
  • Apply with a brush, roller, or sprayer.
WATER-BASED TOPCOATS & PIGMENTED FINISHES

High Performance Water-Based Topcoat is:

  • An Interior polyurethane/acrylic blend.
  • Clear drying.
  • highly resistant to water and household chemicals.
  • Apply with a brush or sprayer.

Flat Out Flat Water-Based Topcoat is:

  • An interior acrylic formulation.
  • Clear drying.
  • provides an extremely flat finish with high durability.
  • Apply with a brush or sprayer.

Enduro-Var II Water-Based Topcoat is:

  • An interior oil-modified water-based urethane.
  • Dries to a light, amber tone.
  • Made with over 50% renewable resources.
  • Apply with a brush or sprayer.

Water-Based Milk Paint is:

  • A premium interior and exterior-rated acrylic formulation.
  • Self-sealing and does not require topcoat.
  • Is made with over 50% renewable resources.
  • Is available in 12 popular colors, plus two tint bases.
  • Apply with a brush, roller, or sprayer.

Water-Based Glaze Effects is:

  • An interior oxidating acrylic formula.
  • Available in 6 colors, including a Clear Base.
  • Is a decorative specialty finish.
  • Can be intermixed to create custom colors.
  • It requires a topcoat
  • Apply with a brush, roller, or sprayer

Pro Image Water-Based Flooring Topcoat is:

  • An interior polyurethane.
  • Clear drying.
  • Levels to a smooth, hard, durable finish.
  • Provides excellent slip and black heel mark resistance.
  • Apply with a brush, roller, or pad applicator.
INTERIOR WATER-BASED STAINS

Water-Based Wood Stain is:

  • Made with over 50% renewable resources.
  • It’s available in 18 deep brilliant colors.
  • And provides universal coverage on many wood species.
  • Apply with a brush or sprayer.

Water-Based Pre-Stain Conditioner is:

  • Used to control blotching on hard-to-stain woods.
  • And to reduce Water Based Wood Stains.
  • Apply with a brush or sprayer.

Water-Based Dye Stain is:

  • A penetrating stain with ink-like consistency.
  • It is available in 14 vibrant colors.
  • And can be used as a toner.
  • Apply with a brush or sprayer or wiping on.

Water-Based Dye Stain Reducer is:

  • The clear base used to reduce Dye Stain colors.
WATER & OIL EXTERIOR FINISHES

Exterior 450 Clear Water-Based Topcoat is:

  • A polyurethane formulation.
  • Tintable to dark colors.
  • Contains UV absorbers & Mildewcides to protect the finish.
  • Clear drying.
  • Apply with a brush or sprayer.

 450 White Water-Based Topcoat is: 

  • A pigmented polyurethane formulation.
  • Is tintable to light and pastel colors.
  • Contains UV absorbers & mildewcides to protect the finish.
  • Apply with a brush, roller, or sprayer.

Exterior 450 Water-Based Stain is:

  • Made with over 50% renewable resources.
  • Available in 10 colors, including a clear base.
  • Contains U.V. absorbers & mildewcides to protect the finish.
  • Apply with a brush or sprayer.

Water-Based Milk Paint is:

  • A premium Interior and exterior-rated acrylic formulation.
  • Self-sealing and does not require topcoat.
  • Made with over 50% renewable resources.
  • Available in 12 popular colors, plus two tint bases.
  • Apply with a brush, roller or sprayer.

Outdoor Oil is:

  • A penetrating oil wood preservative.
  • Contains UV absorbers and mildewcides to protect the finish.
  • This finish will amber as it ages.
  • A maintenance product. Reapply when wear becomes evident.
  • Apply with a brush, roller or sprayer.
INTERIOR OIL STAINS & AMBERING TOPCOATS

Gel Satin Oil-Based Topcoat is:

  • A heavy-bodied, no-drip oil and urethane formula.
  • Designed to provide a hand-rubbed look.
  • Will amber as it ages.
  • Apply with a brush or wipe on.

Gel Oil-Based Stain is:

  • A heavy-bodied, no-drip formula.
  • Available in 14 deep, rich, uniform colors.
  • Apply with a brush, roller, or wipe on.

 Arm-R-Seal Oil-Based Topcoat is:

  • A penetrating sealer with a high-quality urethane formulation.
  • It provides long-lasting, durable protection.
  • and works beautifully on projects with detail.
  • This finish will amber as it ages
  • Apply with a brush or wipe on.

Liquid Oil-Based Wood Stain is:

  • a traditional, pigmented liquid wiping stain
  • Available in 14 colors
  • Can be used as a toner with Arm-R-Seal
  • Apply with a brush or wipe on.

Oil-Based Pre-Stain Conditioner is:

  • Designed to control blotching on hard-to-stain woods.
  • And penetrates the grain to promote uniform acceptance of oil stains.
  • Apply with a brush or wipe on.

Oil-Based Seal-A-Cell Clear is:

  • Formulated with a blend of oils, urethanes, and wax.
  • Is GF’s deepest penetrating close-to-the-wood sealer.
  • And the best choice for highlighting figured wood.
  • Apply with a brush or wipe on.

Hard Wax Oil is:

  • A urethane-solids polymer in a blend of oil & wax.
  • Enhances the natural look of wood.
  • One of our easiest finishes to use.
  • It’s best used with optional GF Hardener to shorten dry time and provide superior durability.
  • This is a maintenance product. Reapply when wear becomes evident.
  • Apply with a white pad or plastic spreader.

 Oil Based Wood Bowl Finish is:

  • A pure urethane formulation.
  • Highlights figured wood beautifully
  • Apply with a brush or wipe on.
INTERIOR MAINTENANCE PRODUCTS

Butcher Block Oil is:

  • A mineral oil formulation.
  • Meets all requirements for use on wooden surfaces that come in contact with food.
  • This is a maintenance product. Reapply when wear becomes evident.
  • Apply with a cloth.

Orange Oil is:

  • A routine cleaner for cured wood finishes
  • Non-combustible with a fresh orange scent
  • Apply with a cloth

Satin Finishing Wax is:

  • A blend of waxes.
  • Produces a soft sheen and feel over any wood finish.
  • Can be used as a polish for rubbing out new finishes OR as a scratch-remover.
  • Apply with a cloth.

No matter what your project is, General Finishes has the right product for you. General Finishes is dedicated to using the highest-quality ingredients in all our products, while testing and advancing our water-based finishes with leading-edge technology.

Learn more about GF’s products at Generalfinishes.com. 

General Finishes: We make tomorrow's finishes today.


Related Categories


Satin Finishing Wax

Return

*How Do I Remove Wax from an Existing Finish?*

Even though there is internet chatter about removing wax with 3rd party products, mineral spirits or vinegar, none guarantee success.

There is an old saying in the industry. "Once you wax, you cannot go back". Nothing adheres well to wax and even after cleaning, the wood grain can become contaminated. Wax can penetrate the wood, making future paint or stain finishes or touch-ups difficult or impossible.

The risk of a failure in re-coating over a wax finish is very high. Your best bet is to clean, strip, and sand, but even that is problematic. Here is what we recommend if you want to go ahead.

  1. Scrub with a solvent, such as mineral spirits, to break the wax barrier. Follow with several applications of Acetone applied with gray scotch bright pads to scrub the surface.
  2. Then strip the surface. You want to remove as much wax as possible before sanding to minimize the risk of driving the wax into the grain of the wood from the friction of sanding.
  3. Strippers that contain Methylyne Chloride like Zip Strip or Savograns are aggressive strippers but harsher. Gentler strippers are citrus or soy-based such as Citrus Strip or Soy Gel.

After cleaning, test the first coat of finish for adhesion. Rub a nickel across the surface or scrape the first coat lightly after 24 hours with a moderately sharp object such as a blunt standard table knife, not a sharp or serrated knife.

If you are finishing as a professional, NEVER guarantee a finish applied over wax. Here is a suggestion for your contracts:

We cannot warrant finishes over an existing piece of furniture. If products containing silicone (such as dusting sprays), oil soaps or waxes have been previously used on the piece, they may contaminate a new finish and prevent adhesion. In these situations, it is best to strip and sand the entire piece. Occasionally, a previous wax finish or silicone may be impossible to completely remove.

________ (Initials) I acknowledge that this piece has never been waxed/polished with a silicone-based dusting spray or cleaned with oil soaps.

________ (Initial) I have no knowledge of previous cleaning products used but realize they may have been applied by previous owners.

Related Categories


*Which Is Better as a Sealer? Topcoat or Wax?

It depends on whether you are looking for aesthetics or durability.

A topcoat will provide greater durability and protection than wax finishes over time.

While wax finishes are lovely, they typically show wear (fingerprints) and are not permanent, requiring semi-annual to annual maintenance.

Wax is a low durability finish. It’s fine for a decorative piece that will receive light traffic. It is absolutely not strong enough for tables, kitchen cabinets, or other surfaces that will see frequent use.

Wax takes a bit of elbow grease to apply.

Furthermore, nothing adheres well to wax, which can impact future finish changes. Even though there is internet chatter about removing wax with 3rd party products or mineral spirits, the risk of a failure in re-coating over a wax finish is very high and sometimes impossible.

If you love a wax finish, try General Finishes Satin Finishing Wax. If you want the look and feel of wax with more durability, use our General Finishes Flat Out Flat Topcoat. For even more protection, use General Finishes High Performance Topcoat.

Related Categories


Should I Use Satin Wax to Seal My Kitchen Cabinets?

You can...we do we do believe that wax can be a beautiful addition to many projects. However, it is best not to use wax in high-use temperature-dependent situations like kitchens or bathrooms.

Furthermore, kitchen cabinets require long-term protection and high-quality resistance to wear. Wax provides far less protection and durability than an engineered resin based top coat like High Performance or any of our professional Enduro Spray finishes. A particular problem are range hoods and dishwasher panels - wax cannot stand up to the heat and may melt and run.

Wax finishes typically show wear (ex: fingerprints) and require semi-annual to annual maintenance. Furthermore, touch-ups or changes are impossible once wax has been added to the surface because no finish will adhere well to wax. Even though there is internet chatter about removing wax with 3rd party products or mineral spirits, the risk of a failure in re-coating over a wax finish is very high. Resin-based topcoaats can be removed or covered with a new finish without a problem if you ever decide to touch-up or refinish your cabinets in the future.

Related Categories


Can Gel Stain be sealed with wax instead of top coat?

Wax can be used over Gel Stain, if you prefer. Just let the Gel Stain dry 24-48 hours before applying the wax. Note: wax is not a durable product. It needs yearly reapplication, will show daily use (finger marks and smudges) and may be very difficult to remove if a future topcoat application is desired.

Related Categories


Can Glaze Effects be sealed with wax instead of top coat?

Yes, you can use Satin Wax instead of top coat if you prefer. Although GF loves the look of wax, we recommend using top coat because wax is not as durable. Wax requires annual maintenance and it must be removed if you want to apply topcoat in the future.

Related Categories


*How Do I Buff Out High Performance Water Based Topcoat to a High Gloss?

There are several techniques by Jeff Jewitt of Homestead Finishing Products:

DRY BUFF WITH MIRKA ROYAL MICRO PAPER

Using Mirka Royal Micro sandpaper, always start with 1500-grit sandpaper. Begin with a small area, make 2-3 passes, then evaluate results. Go to a heavier grit if surface irregularities are not fully removed. Finish with 1500-grit paper.

DRY/WET BUFF WITH ABRALON POLISHING DISCS

Start by dry sanding with Abralon 2000-grit, and then 4000-grit. Start slowly, monitor to see if buildup is occurring. A large sized table might take 5-25 sheets of paper.

If needed, lubricate by moistening with General Finishes Satin Finishing Wax, mineral spirits, or naphtha. Never use water as a lubricant.

If lubricated, one sheet of 1000-grit or 1500-grit should do the entire table.

BUFFING/POLISHING WITH PRESTA POLISHING KITS

Spray Presta polish on buffing pad stuff to lubricate the pad. Apply a quarter-sized dab of polish to sand one section. Spread with pad. Continue section by section. Mist buffing pad with Presta lubricating material when it gets too dry. You should be able to use a buffing pad on 10-20 tables before washing and reusing.
 
When done, mist entire surface with and buff with a micro-cloth to remove splatter

NOTE: Never wet sand a water-based finish.

Related Categories


What Finishes & Coatings does General Finishes Offer for Retailers, Homeowners and DIY??

General Finishes offers water, oil, and maintenance finishes that meet the needs of homeowners, woodworkers, and DIY’ers. Comprehensive videos are available for each product on YouTube, plus dynamic comparison charts at GeneralFinishes.com/COMPARE.

All General Finishes water-based finishes are:

  • VOC compliant in all 50 states
  • Water cleanup 
  • Low odor
  • Non-flammable
INTERIOR PRIMERS

Water Based Stain Blocker is:

  • An epoxy acrylic formulation.
  • Prevents tannin bleed-through & discoloration.
  • Has high build with excellent adhesion properties.
  • Apply with a brush, roller, or sprayer.
WATER-BASED TOPCOATS & PIGMENTED FINISHES

High Performance Water-Based Topcoat is:

  • An Interior polyurethane/acrylic blend.
  • Clear drying.
  • highly resistant to water and household chemicals.
  • Apply with a brush or sprayer.

Flat Out Flat Water-Based Topcoat is:

  • An interior acrylic formulation.
  • Clear drying.
  • provides an extremely flat finish with high durability.
  • Apply with a brush or sprayer.

Enduro-Var II Water-Based Topcoat is:

  • An interior oil-modified water-based urethane.
  • Dries to a light, amber tone.
  • Made with over 50% renewable resources.
  • Apply with a brush or sprayer.

Water-Based Milk Paint is:

  • A premium interior and exterior-rated acrylic formulation.
  • Self-sealing and does not require topcoat.
  • Is made with over 50% renewable resources.
  • Is available in 12 popular colors, plus two tint bases.
  • Apply with a brush, roller, or sprayer.

Water-Based Glaze Effects is:

  • An interior oxidating acrylic formula.
  • Available in 6 colors, including a Clear Base.
  • Is a decorative specialty finish.
  • Can be intermixed to create custom colors.
  • It requires a topcoat
  • Apply with a brush, roller, or sprayer

Pro Image Water-Based Flooring Topcoat is:

  • An interior polyurethane.
  • Clear drying.
  • Levels to a smooth, hard, durable finish.
  • Provides excellent slip and black heel mark resistance.
  • Apply with a brush, roller, or pad applicator.
INTERIOR WATER-BASED STAINS

Water-Based Wood Stain is:

  • Made with over 50% renewable resources.
  • It’s available in 18 deep brilliant colors.
  • And provides universal coverage on many wood species.
  • Apply with a brush or sprayer.

Water-Based Pre-Stain Conditioner is:

  • Used to control blotching on hard-to-stain woods.
  • And to reduce Water Based Wood Stains.
  • Apply with a brush or sprayer.

Water-Based Dye Stain is:

  • A penetrating stain with ink-like consistency.
  • It is available in 14 vibrant colors.
  • And can be used as a toner.
  • Apply with a brush or sprayer or wiping on.

Water-Based Dye Stain Reducer is:

  • The clear base used to reduce Dye Stain colors.
WATER & OIL EXTERIOR FINISHES

Exterior 450 Clear Water-Based Topcoat is:

  • A polyurethane formulation.
  • Tintable to dark colors.
  • Contains UV absorbers & Mildewcides to protect the finish.
  • Clear drying.
  • Apply with a brush or sprayer.

 450 White Water-Based Topcoat is: 

  • A pigmented polyurethane formulation.
  • Is tintable to light and pastel colors.
  • Contains UV absorbers & mildewcides to protect the finish.
  • Apply with a brush, roller, or sprayer.

Exterior 450 Water-Based Stain is:

  • Made with over 50% renewable resources.
  • Available in 10 colors, including a clear base.
  • Contains U.V. absorbers & mildewcides to protect the finish.
  • Apply with a brush or sprayer.

Water-Based Milk Paint is:

  • A premium Interior and exterior-rated acrylic formulation.
  • Self-sealing and does not require topcoat.
  • Made with over 50% renewable resources.
  • Available in 12 popular colors, plus two tint bases.
  • Apply with a brush, roller or sprayer.

Outdoor Oil is:

  • A penetrating oil wood preservative.
  • Contains UV absorbers and mildewcides to protect the finish.
  • This finish will amber as it ages.
  • A maintenance product. Reapply when wear becomes evident.
  • Apply with a brush, roller or sprayer.
INTERIOR OIL STAINS & AMBERING TOPCOATS

Gel Satin Oil-Based Topcoat is:

  • A heavy-bodied, no-drip oil and urethane formula.
  • Designed to provide a hand-rubbed look.
  • Will amber as it ages.
  • Apply with a brush or wipe on.

Gel Oil-Based Stain is:

  • A heavy-bodied, no-drip formula.
  • Available in 14 deep, rich, uniform colors.
  • Apply with a brush, roller, or wipe on.

 Arm-R-Seal Oil-Based Topcoat is:

  • A penetrating sealer with a high-quality urethane formulation.
  • It provides long-lasting, durable protection.
  • and works beautifully on projects with detail.
  • This finish will amber as it ages
  • Apply with a brush or wipe on.

Liquid Oil-Based Wood Stain is:

  • a traditional, pigmented liquid wiping stain
  • Available in 14 colors
  • Can be used as a toner with Arm-R-Seal
  • Apply with a brush or wipe on.

Oil-Based Pre-Stain Conditioner is:

  • Designed to control blotching on hard-to-stain woods.
  • And penetrates the grain to promote uniform acceptance of oil stains.
  • Apply with a brush or wipe on.

Oil-Based Seal-A-Cell Clear is:

  • Formulated with a blend of oils, urethanes, and wax.
  • Is GF’s deepest penetrating close-to-the-wood sealer.
  • And the best choice for highlighting figured wood.
  • Apply with a brush or wipe on.

Hard Wax Oil is:

  • A urethane-solids polymer in a blend of oil & wax.
  • Enhances the natural look of wood.
  • One of our easiest finishes to use.
  • It’s best used with optional GF Hardener to shorten dry time and provide superior durability.
  • This is a maintenance product. Reapply when wear becomes evident.
  • Apply with a white pad or plastic spreader.

 Oil Based Wood Bowl Finish is:

  • A pure urethane formulation.
  • Highlights figured wood beautifully
  • Apply with a brush or wipe on.
INTERIOR MAINTENANCE PRODUCTS

Butcher Block Oil is:

  • A mineral oil formulation.
  • Meets all requirements for use on wooden surfaces that come in contact with food.
  • This is a maintenance product. Reapply when wear becomes evident.
  • Apply with a cloth.

Orange Oil is:

  • A routine cleaner for cured wood finishes
  • Non-combustible with a fresh orange scent
  • Apply with a cloth

Satin Finishing Wax is:

  • A blend of waxes.
  • Produces a soft sheen and feel over any wood finish.
  • Can be used as a polish for rubbing out new finishes OR as a scratch-remover.
  • Apply with a cloth.

No matter what your project is, General Finishes has the right product for you. General Finishes is dedicated to using the highest-quality ingredients in all our products, while testing and advancing our water-based finishes with leading-edge technology.

Learn more about GF’s products at Generalfinishes.com. 

General Finishes: We make tomorrow's finishes today.


Related Categories


Furniture Care

Return

*Which Is Better as a Sealer? Topcoat or Wax?

It depends on whether you are looking for aesthetics or durability.

A topcoat will provide greater durability and protection than wax finishes over time.

While wax finishes are lovely, they typically show wear (fingerprints) and are not permanent, requiring semi-annual to annual maintenance.

Wax is a low durability finish. It’s fine for a decorative piece that will receive light traffic. It is absolutely not strong enough for tables, kitchen cabinets, or other surfaces that will see frequent use.

Wax takes a bit of elbow grease to apply.

Furthermore, nothing adheres well to wax, which can impact future finish changes. Even though there is internet chatter about removing wax with 3rd party products or mineral spirits, the risk of a failure in re-coating over a wax finish is very high and sometimes impossible.

If you love a wax finish, try General Finishes Satin Finishing Wax. If you want the look and feel of wax with more durability, use our General Finishes Flat Out Flat Topcoat. For even more protection, use General Finishes High Performance Topcoat.

Related Categories


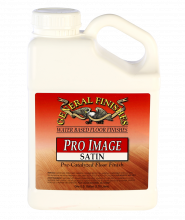
Will a steam mop damage Pro Image or Pro Shield finish?

A steam mop won't damage the finish film but it will force moisture into the wood between the boards or into any open scratched areas on the surface of the board. This could cause a de-lamination of the finish from the wood or damage to the wood itself. We recommend a commercial floor cleaner such as Bona floor cleaning system.

Related Categories


*What is the Difference Between Dry Time and Cure Time?

Dry time is the recommended length of time between coats of product, often called recoat time, and cure time is the length of time recommended before subjecting your finished project to daily use. The following factors can influence your dry time:

TEMPERATURE AND HUMIDITY

All of General Finishes products' dry and cure time recommendations are subject to the conditions of the room in which you are refinishing and storing your piece. Ideal conditions are 70°F/21°C and 50% humidity. Cooler temperatures and high humidity levels can prolong dry time any from 8-10 hours.

APPLYING OIL AND WATER-BASED PRODUCTS TO THE SAME PROJECT

When applying an oil-based product over a water-based product and vice versa, dry time increases. It's extremely important to be sure your first application of finish has completely dried before applying the next layer. When switching from an oil-based product to a water-based product, wait 72 hours to apply your next coat of product. When switching from a water-based product to an oil-based product, wait 24 hours.

YOUR STARTING SURFACE

Applying product to a raw wood surface will result in a shorter dry time. When applying over an existing finish, dry time increases.

METHOD OF APPLICATION

Painting your finish on will require a longer dry time. If you are applying and then wiping off, or spraying, dry time is less.

Before adding additional coats of product, the following DRY times should be honored:

The following are average CURE times based on recommended temperature and humidity:

  • 21 days for water-based products
  • 30 days for oil-based products
  • You can use a piece lightly after about 7 days but be cautious - the finish will still be curing for another 2 or 3 weeks.

Some of General Finishes wait times might seem a bit generous but we need to account for all variables beyond our control. You can test your surface for dryness ahead of schedule by knowing what to look for. There are two ways to tell if it is an oil-based product is dry. If it is no longer tacky and it doesn't smell, it is dry. You can tell if a water-based product is dry by touching it. If its cool to the touch, it's not dry. If you can sand a water-based topcoat to a powder, its dry.

Related Categories


*What is the Cure Time After Applying a Finish to Furniture or Cabinets?

"Cure time" is the amount of time needed for the finish on a piece to reach maximum hardness and be ready for normal use. This is different than "dry time." 

Water-based finishes cure faster than oil-based finishes, approximately 21 days vs 30 days under ideal conditions (70°F and 50% humidity).

During the curing stage, treat your project with special care. Avoid placing heavy objects on it. Always avoid the use of furniture polishes, dusting sprays or oil soaps as they may contaminate the finish for future re-coating. Use a water-dampened cloth for regular cleaning. Wipe up spills in a timely manner.

WATER SPILLS AND DAILY USE: Clean water spills up as they occur during regular use and protect from heat. Although General Finishes products are water resistant, they are not impervious to water. Surfaces will not be damaged by spilled water so long as it is cleaned up promptly. Use coasters to protect your wood from standing water and pot holders to protect from heat.


Related Categories


*How Should I Clean My Finished Project?

After your finish has cured, the best way to clean is with a water-damp rag. If your surface requires deep cleaning due to grease or grime build-up, add a speck of a strong dish detergent, such as Dawn or a bit of vinegar to your damp rag.

If need deeper cleaning, use General Finishes Orange Oil Polish.

Avoid using oil-soap or silicone-based daily cleaners or dusting sprays These products and the chemicals in other cleaners can contaminate your finish, preventing adhesion of future finishes. 

NOTE: Do not clean furniture until the finish has cured completely. 

Cure Time Guidelines: 

  • Water Based Finishes: 21 days
  • Oil Based Finishes: 30 days 

Related Categories


Repairing & Trouble Shooting Oil Based Finishes

Return

*How Can I Reduce the Sheen of an Oil-Based Topcoat? I Used Semi-Gloss and It's Too Shiny.

You can rub down the finish with 0000 steel wool and General Finishes Orange Oil to lower the sheen.

Pro Tip: GF does not recommend using steel wool with water-based finishes because the particles can become embedded and rust.

Related Categories


*Why Does My Oil Finish Have a Haze When Applying Arm-R-Seal Over a Linseed Oil Based Stain?*

Linseed oil stains take a LONG time to dry. When applied too soon, Arm-R-Seal will likely prevent the linseed oil-based stain from gassing out and drying completely due to solvent entrapment, causing a haze.

Related Categories


*Why Isn't the Salad Bowl Oil I Applied to Walnut Serving Boards Drying After Two Coats?

Some pieces of wood contain a lot of oil and walnut can be finicky.

The oil in the walnut wood may be causing the problem you've described - a longer dry time might have been needed over an oily wood. If the wood does not dry over the next few days then it may be necessary to sand down and start over.

Unfortunately, if the first coat does not dry, the second will never dry.

Related Categories


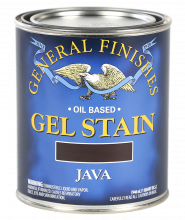
*How Can I Lighten the Color of the Java Gel Stain I Have Applied?

It's always possible to darken a stained surface, but you cannot lighten a stained surface after the finish has dried.

When the surface is still wet, you can try to lighten the color by scrubbing with mineral spirits. If the finish has hardened, you will need to sand down your current stain and start over or use one of our paints.

You can mix GF Gel Stain colors to create a custom color.

You can also thin Gel Stain with 10-15% mineral spirits.

Always test our color on a hidden area of your project before beginning.

Related Categories


*How Do I Correct the Haze That Appeared When I Applied Gel Satin Topcoat Over 3 Coats of Gel Stain?*

Haze (the technical term is blush) is caused by too many coats applied too quickly. A recoat time of 12 hours is not enough dry time when applying over an EXISTING finish. To remove the blush or haze, you can either wipe the area with a strong solvent, like xylene or lacquer thinner, or you can try sanding out the haze and then reapply the topcoat.

Always allow more dry time when applying oil-based products over an existing finish. Here are General Finishes recommended dry times for applying multiple coats of Gel Stain and Gel Topcoat over an existing finish.

  • Dry-Time to Touch: 4-6 hours
  • Dry-Time to Recoat with Stain When "Wiping Off": 72 hours. Do not recoat until you are sure the stain is dry. If in doubt, wait longer. Humidity or cold temperatures will increase dry times.
  • Dry-Time to Recoat with Stain When "Painting On": 72 hours. Do not recoat until you are SURE the stain is dry. If in doubt, wait longer. Humidity or cold temperatures will increase dry times.
  • Dry-Time to Apply Oil-Based Topcoat over Gel Stain: 72 hours
  • Dry-Time to Apply Water-Based Topcoat: 72 hours
  • Dry-Time for Light Use: 7-10 days
  • Dry-Time Over Laminate or Other Non-Porous Surfaces: At least 72 hours, likely more. Test to your satisfaction before proceeding.
  • CURE TIME: Cure time for all General Finishes oil-based products is about 30 days. During the curing process, protect your flat surfaces and avoid placing heavy items on horizontal surfaces or sliding anything across the surface.

Dry time and cure time are unrelated. In simplest terms, here is the difference between drying and curing: Drying is the evaporation of solvents in oil-based products, and water in water-based products. Curing is when the product hardens for full use.

Related Categories


*How Do I Remove a White Mark Caused By a Vodka Spill?

The term for white or cloudy marks is blush, caused by some type of moisture in the finish. Alcohol damage is more severe than water rings.

General Finishes tests all our topcoats against both isopropyl and denatured alcohol with results showing recovery within an hour.

In most cases, the white mark will fade if the spill is cleaned up in a timely manner. If the alcohol had been sitting on the surface for an extended period then it might not be able to bounce back.

HOW TO REMOVE WHITE MARKS

The afflicted surface needs to be scuffed and sanded first. Second, we recommend applying a sanding sealer to protect the top. Sanding sealer has a larger resin particle, so it will provide a better build for the next sanding step.

Learn more about General Finishes Enduro Sanding Sealer here.

Then finish with your topcoat.

Future forward, if you have a project that receives high-use, a glossier sheen will be more durable. The flatting agents that are required to formulate flat sheens cause a slight loss in durability and water resistance.

If you are set on a flat sheen on a new project, use two coats of semi-gloss first and finish with the flat sheen topcoat.

Related Categories


*How Can I Get Stain and Topcoat to Adhere to Knots on Pine? When I Apply the Topcoat, the Stain Starts Pulling Off.

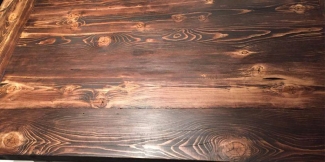
Uneven Gel Stain on Knotty Pine

Pine is full of pitch (rosin or tar) and stain alone will never adhere to these areas. The knots are so dense and hard there is no grain to hold the stain in place

To fix, sand the table lightly with 120-grit sandpaper and restain the table. To improve adherence of the stain, mix 2 parts Gel Stain with one part Gel Satin Topcoat. Apply as many coats of the mix as needed to obtain the desired color, allowing 24-hour dry time between coats.

Note: The stain may never adhere well to the knots because they are too dense to hold a stain. You can try dry brushing the knots with the stain to deepen the color and the protect with topcoat.

Note: Pine knots will always continue to bleed through a light paint. You must incorporate the knots as part of the finish design.

Related Categories


*Why is Arm-R-Seal Blotching Over an Oil Based Stain on a Table I am Refinishing?

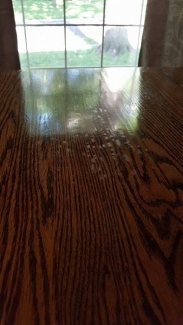
Arm-R-Seal Blotching

The problem areas on your table are probably caused by surface contamination from oils, waxes or cleaning products used over the years.

Contaminants from dusting sprays that contain silicone will also impact the appearance and adherence of a finish - silicone is almost impossible to remove. Oil soaps and wax can also cause adhesion failures. This may be why the finish is performing differently on the leaves vs the table top. Adhesion failure is often more obvious in the deepest patterns of grain because the contamination is driven deep into the grain. 

Unfortunately, even though you sanded the table down to raw wood, sanding alone will not remove this type of contamination. In fact, sometimes the friction heat of sanding will drive contaminants deeper into the grain. 

You have two options, and we recommend the first:

  1. Strip, sand and refinish the table. Use a strong solvent such as a paint stripper and, brushing the surface with a soft brass brush to clean out the grain. Follow this by cleaning with 0000 Medium steel wool and mineral spirits.
  2. Buff the existing finish with 0000 steel wool and mineral spirits, particularly in the affected areas, and then re-apply several more coats of Arm-R-Seal

Related Categories


*How Do I Match Putty Wood Filler to a Dark Stain?

Putty comes in two forms, pre-colored or as a stainable wood filler designed to fill minor imperfection such as nail holes, cracks, and gouges in the wood surface. Putty will display stain a bit differently than wood, so it is not a "perfect" fix, but a good one.

The goal is to get the best possible color match to either the color of the raw wood or the color of your existing finish.

The easiest route is to buy a putty that is pre-mixed with color. Both Famowood and Timbermate make colors of putty in several shades. Famowood is available in both oil-based and water-based formulas. Timbermate is an interior grade water-based filler and comes in 13 pre-mixed colors.

Be careful to note if you are buying a solvent (oil) based putty or a water-based putty. Either will work as long as you observe opposing dry times when switching as you would do for finishes.

DRY TIMES:

  • Water over oil: a minimum of 72 hours
  • Oil over water: a minimum of 24 hours

If you cannot purchase the right color match, you can tint the putty with stain to create a custom color. For example:

TO USE:

  • Prep sand your piece. If you are using with an existing finish, thoroughly prep clean and scuff sand your project first.
  • Press wood filler into defected area.
  • When dry, sand flush with surrounding surfaces after approximately 15-30 minutes, depending on temperature, depth of fill and whether the putty is oil or water based.

Finally, another good putty is Color Putty. They make both water and oil-based versions in ready-made colors. This is a soft putty that can be used AFTER the project is finished to fill nail holes or small imperfections.

ALWAYS TEST filler, stain and finish combinations on a small area before applying to your project.

Related Categories


*How Do I Remove Water Stains or Discoloration Before Staining Raw Wood?

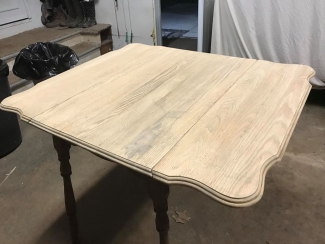
Sanded oak table with water stain before

You can use oxalic acid when trying to remove discoloration or water damaged spots. The entire surface needs to be treated and then neutralized with a clean water wash.

Mix 4 oz. per quart of warm water. Wipe the entire surface down with the mixture and allow to dry completely. Rinse table with a clean damp rag. Finish sand with 180 grit followed by the final sanding schedule below. Make sure to wear a  dust mask when sanding wood treated with oxalic acid - the dust can irate the nose. 

Lastly, finish sand with the appropriate grit paper:

  • Oil-based products: 150-grit
  • Water-based products: 220-grit

It’s not a bleach but it will brighten the wood back to its original color. 

Related Categories


How Do I Remove Watermarks From an Existing Finish?

Sometimes watermarks cannot be removed.

Dark rings are an indication that the watermark is in the wood.

White rings are an indication that the watermark is in the finish.

Possible solutions:

Apply Oxalic Acid mixed 6 oz per quart of water. This can minimize the discoloration but there are no guarantees.

Use bleach is a last resort option. It can remove some rings but may cause a permanent change in the wood.

Your best option is to sand out with 100 grit followed by 120, 150, and then 180. Restain with a darker color.

Related Categories


Repairing & Trouble Shooting Water Based Finishes

Return

*How Do I Treat Steam/Water Spots on My Refinished Surface?

If you see a white ring, Liberon White Ring Remover can correct or soften the problem area. This product, sold at Woodcraft, Rockler and most paint stores, could be a great solution to try before refinishing the table entirely.

Related Categories


*How Can I Get GF Water Based Finishes Off of a Mirror?

Any GF water-based finish can be removed from a mirror using 0000 steel wool and Windex.

Wet the steel wool with Windex and buff the glass. (The steel wool won't harm the mirror but make sure that you don't apply so much liquid that it seeps into the backing.) Wipe the mirror down with a clean/dry paper towel.

However, you can prevent a mistake from happening by applying Frisket to your mirror BEFORE applying finish to the frame. Frisket is a clear finish that brushes on, dries and peels off when you are done painting.

*Windex Warning: Make sure you do not get Windex on water-based finishes. The ammonia in Windex may cause a cloudy appearance to the finish.

Related Categories


How can I prevent bleed through on mahogany furniture from the 1920-1930’s?

Never guarantee a finish on this era of furniture. Inform your customers of this issue and steer customers away from using light colors. Many mahogany pieces from the late 1920's to early 1930's have an aniline dye lacquer finish which can bleed through no matter how many times you paint or prime over it. Although ideal coverage over an aniline dye lacquer can never be guaranteed, the following two products have been known to minimize bleed through:

  1. A stain blocking primer such as General Finishes Stain Blocker or Zinsser B-I-N
  2. A shellac seal coat will usually stop most of the bleeding

Note: If you are trying to cover red mahogany with a white you may never be able to stop the bleed through. Stain Blocker is most likely to stop the bleed-through of all options listed above because it was specifically engineered to block the most persistent bleed-through.

Tips from GF:

  1. Never guarantee a finish on this era of furniture. Inform your customers of this issue and steer customers away from using light colors.
  2. Clean the project and apply 2 coats of General Finishes Stain Blocker with a brush, roller or by spraying. The first coat will absorb contaminants in the wood, causing a color change during the first application, and the second will seal the contaminants. More information regarding Stain Blocker here.
  3. Another primer alternative is Zinsser B-I-N.
  4. Use a dark paint color - there are some pieces that will never work with al light paint.
  5. If none of this works, we recommend that you strip and refinish with a penetrating oil stain followed by a clear coat.

Stripping Recommendations:

  1. Use a good quality citrus stripper or a soy gel stripper as they are more gentle than traditional chemical strippers.
  2. Remove any remaining finish with 150 grit sandpaper.
  3. Once you have removed the old finish, wash the piece down with a 50/50 blend of denatured alcohol and water to remove any residual oils and waxes.
  4. Once these stages have been completed, it is safe to use any type of wood stain to restore the original look of the piece.

Related Categories


*Why is my application of Milk Paint not adhering on previously finished cabinets?

There are several reasons:

1. The cabinets were not prep cleaned and sanded properly. Sanding and cleaning are an essential part of any refinishing process.

In most cases, you can use a 220 sanding pad to scuff the surface and clean with a 50|50 mix of water and denatured alcohol.

Video Tutorial: How to Prep Existing High Use Finishes for Stain or Paint

2. The surface was contaminated with a dusting spray that contained silicone. Silicone is usually impossible to remove.

There are no guarantees with silicone - it is almost impossible to remove. Unfortunately, silicone contaminants, often from dusting sprays, do not become apparent until a new finish is applied and generally cannot be removed from the surface, only moved around and possibly sealed - a bane of the refinishing industry.

You need to power clean the existing finish and put on some type of barrier coat:

  1. Power clean the surface by scrubbing with a strong detergent such as Spic and Span and warm water combination with a gray Scotch-Brite pad. There is also a product called Purge All (Potassium Hydroxide) that works well against silicone contamination. Scrub with green scotch bright pad to remove silicone. It's similar to Spic & Span ( detergent). Others have recommended dishwasher pods dissolved in warm water help break down the oils. After that, clean with denatured alcohol full strength.
  2. Apply 3 coats of dewaxed shellac. Allow each coat to dry thoroughly.
  3. Then cross your fingers and test. Test the first coat of finish by rubbing a nickel across the finish. Or lightly scrape with a blunt table knife (not a sharp or serrated knife).

In most cases, you will need to strip and sand, but even then there is no guarantee of success. If the silicone has migrated into the wood grain through cracks in the old finish, you may not be able to get it all removed.

3. The surface was contaminated with a previous wax finish.

Even though there is internet chatter about removing wax with 3rd party products, mineral spirits or vinegar, none guarantee success. There is an old saying in the industry. "Once you wax, you cannot go back". Nothing adheres well to wax and even after cleaning, the wood grain can become contaminated. Wax can penetrate the wood, making future paint or stain finishes or touch-ups difficult or impossible.

The risk of a failure in re-coating over a wax finish is very high. Your best bet is to clean, strip, and sand, but even that is problematic. Here is what we recommend if you want to go ahead.

  1. Scrub with a solvent, such as mineral spirits, to break the wax barrier. Follow with several applications of Acetone applied with gray scotch bright pads to scrub the surface.
  2. Then strip the surface. You want to remove as much wax as possible before sanding to minimize the risk of driving the wax into the grain of the wood from the friction of sanding.
  3. Strippers that contain Methylyne Chloride like Zip Strip or Savograns are aggressive strippers but harsher. Gentler strippers are citrus of soy-based such as Citrus Strip or Soy Gel.

After cleaning, test the first coat of finish for adhesion. Rub a nickel across the surface or ccrape the first coat lightly after 24 hours with a moderately sharp object such as a blunt standard table knife, not a sharp or serrated knife.

GF does offer a beautiful liquid was; General Finishes Satin Finishing Wax, but we recommend the use of topcoats such as our water-based General Finishes High Performance over dark paint colors or General Finishes Flat Out Flat over low use surfaces for a reliable sealant. We promote glaze effects and stains as other means for adding depth to refinished furniture.

4. The surface was contaminated with an oil-based soap.

5. There was not enough dry time in between coats relative to the temperature and humidity. Ideal Conditions are 70 degrees F and 70% humidity. Refinishing furniture in a space that is below or above the 65-75 degrees F range can lead to problems. The colder your space it is, the longer you have to wait between coats. Cold temperatures slow the dry time and affect how quickly the finish will level, harden and cure.

Our easy rule of thumb is; if it is cold enough to wear a sweater it is too cold to apply a water-based finish.

Related Categories


*Why Did the Finish On My Piece Become Cloudy After Top-Coating Milk Paint with High Performance?

The term for a cloudy, milky appearance in the finish is Blush. There are three causes:

     1. The most common reason is an incompatible stain. For example, using a water-based topcoat over an oil-based based stain. When the top coat is applied, the oil in the stain seeps up through the finish and reacts with the acrylic causing a chemical blush.

To prevent this, either use a quick-drying water-based stain or allow the oil-based stain to dry for 72 hours. You can also seal an oil-based stain with a coat of shellac or lacquer sealer to provide a barrier between the oil and the acrylic.

     2. Another cause for blushing is high humidity. Applying a water-based finish in humidities of over 75% may cause blushing because moisture becomes trapped beneath the finish and cannot evaporate.

You can prevent this condition by increasing air movement in the finishing area with a fan. All water needs to evaporate is sufficient air movement. You can also improve drying conditions by increasing the temperature in the drying area.

     3. Another common cause is a wet object or a water spill left two long on the surface. In most cases, the white mark will recover and fade within an hour if the spill is cleaned up in a timely manner. If the water has been sitting on that area for an extended period of time then it might not be able to bounce back.

To fix this, the surface needs to be scuffed and sanded first. Second, we recommend applying a sanding sealer to protect the top. Sanding sealer has a larger resin particle, so it will provide a better build for the next sanding step. Then finish with your topcoat.


Related Categories


*Why is High Performance Streaking When Applied over Annie Sloan Chalk Paint?

This is a guesstimate as GF cannot assist with the performance of another manufacturer's product used in conjunction with our own finishes.

It looks like Annie Sloan Chalk Paint is absorbing some of the topcoat because it is so porous. High Performance does not streak over a sealed surface when properly applied. Most likely the chalk paint is so dry it is pulling some of the solvents away from the High Performance, causing an uneven finish or the appearance of streaking. This happens on the original powder Chalk or Milk Paints also.

Possible solution: Porous paints such as chalk paint may require additional coats of High Performance Topcoat to seal off the paint. If the first coat absorbs into the paint it will require multiple coats of High Performance to build a film of sealer above the paint. Using a foam brush will accent the streaking due to the number of strokes needed. We suggest a fairly liberal application with a large applicator such as a foam roller or a pad applicator.

Always test before proceeding with the entire project when using General Finishes projects with other manufacturer's products.

Related Categories


*How Do I Apply White Milk Paint Over Cabinets That Have Been Burned?

GF recommends that you replace the doors if you want to use a white paint like General Finishes Antique White Milk Paint. Some things are not meant to be and painting charred doors is a recipe for trouble. The charring will bleed through.

Related Categories


How do I repair a section that I have buffed through using Enduro-Var over an epoxy on a guitar

Our first concern is the use of the epoxy. Although you have may had success with this process previously, we do not recommend the use of Enduro-Var with epoxy or any oil based products. Enduro-Var works well on its own or with GFs water based finishes. There is a great possibility that future finishes can fail.

Nor do we recommend adding denatured alcohol, which should not be used in any of General Finishes water based products. Denatured alcohol can change the polarity of a finish formula, kicking out polymer particles that would look like grit on the surface. Denatured alcohol could also deactivate the defoamers in the formula.

The use of Extender won't help you. It is a water based product and will not melt through existing layers of finish in the same manner that solvent finishes do.

We interpret that you are trying to remove witness lines which are basically sanding marks. For your current situation, we recommend attempting to build the area with just Enduro-Var, then buffing out with a 2000-3000 grit. You may have to sand down and start over if that is not successful.

Future forward. Use Enduro-Var on its own. Although it is a favorite among Luthiers, it is a unique hybrid finish that does not pay well with other finishes.

Related Categories


*How Do I Correct Color Lift when Applying High Performance Over GF Water Based Dye Stain?

It is normal to see a bit of stain on the brush when applying the first coat of topcoat. Topcoats often pull a bit of color on the first pass, but good preparation will minimize this.

To prepare open grains woods such as raw Oak for a water-based stain, we recommend sanding with 180-grit followed by no more than 220-grit sandpaper.

300-grit or 400-grit sandpaper is too fine for preparing raw wood. Too fine of a grit changes the wood from a porous surface to one that is too smooth to absorb the stain, which causes the first top coat application to pull excessive color (it is like trying to apply stain to glass).

There is always a small amount of color pull when using water-based stains, but the smooth surface escalates this condition. This was evident in the areas that you used the brush to remove excess topcoat.

See recommended sanding schedules here.

Instructional Video: How to Prep Sand New or Raw Wood

Here are some options to try. Always test a small area before proceeding with your entire project.

  1. TONING: Lightly sand the light areas with a 220-grit sanding foam pad to open up the pores of the wood.
    Create a toning mix of 10-20% Dye Stain to 80-90% topcoat. Using a small brush, apply this mix over the light areas to blend with the darker areas.
    Let this dry 3-4 hours. Then apply another coat of the mix over the entire surface. If this is successful, then apply 2-3 coats of the topcoat.
  2. GLAZING: Glaze the light areas. This will change the look of your doors but is an easier remedy.
  3. START OVER: Optimally, you should sand down to bare wood and start over with this prep sanding schedule indicated able.
    You can apply the Dye Stain directly to the wood, or mix in 10% topcoat to help lock in the color.

Related Categories


*How Do I Repair Chipping Paint Applied Over an Existing Finish?

There is no easy solution to this problem. General Finishes Milk Paint has strong adhesion properties but there are several reasons this finish could fail:

  1. The cabinets were not prep cleaned and sanded properly. Sanding and cleaning are an essential part of any refinishing process. Sanding lightly with the correct sandpaper grit will help clean and smooth the surface, but it will also abrade the previous finish which gives the new paint something to grip onto. Product may not adhere properly to a surface that is un-sanded or that is over-sanded (making the surface too smooth).

    In most cases, you can use a 220 sanding pad to scuff the surface and clean with a 50|50 mix of water and denatured alcohol.

  2. The surface was contaminated with a dusting spray that contained silicone. Silicone is usually impossible to remove. You can try scrubbing the surface with a strong detergent such as Spic and Span and warm water combination using a gray Scotchbrite pad. After that clean with denatured alcohol full strength.

    In most cases, you need to strip and sand, but there is no guarantee of success. Test a small area first.

  3. The surface was contaminated with a previous wax finish. Wax is also difficult or impossible to remove. Nothing adheres well to wax, and once you use it the wood grain can become contaminated. The wax can penetrate the wood, making future paint or stain finishes or touch-ups difficult or impossible. Even though there is internet chatter about removing wax with 3rd party products or mineral spirits, the risk of a failure in re-coating over a wax finish is very high.
  4. The surface was contaminated with an oil based soap.
  5. A lack of compatibility with the deglosser.
  6. A lack of compatibility with another manufacturer's top coat.

The most likely suspect is contamination. If any wax or silicone-based product has been used on the original surface, adhesion problems such as bubbling and chipping can be expected.

You could try spot sanding then repainting the chipped areas but that rarely is a good solution - we think the problem will continue to occur.

We recommend getting the cabinets into a paintable condition by doing the following:

  1. Sand back all the new paint and cleaning with a high strength detergent such as Spic and Span mixed with warm water. Rinse thoroughly and let dry.
  2. Prep sand with a 220-grit sanding PAD - do not use a finer grit or the new paint won't hold.
  3. Scrub with a Scotch-Brite Pad and a 50\50 mix of denatured alcohol and water. When preparing any surface we highly recommend using a 50/50 mix of denatured alcohol and water instead of commercial cleaning solutions.

    The mix is more effective because it has a higher alcohol content, you can get denatured alcohol locally, and it is cheaper. Many commercial cleaning solutions have extremely high VOCs while denatured alcohol is much lower.

    Furthermore, the 50/50 mix does not have salt in it. The salt in commercial cleaning solutions could linger in the substrate and cause salt contamination when clear coating at the end of your project, which could create a white haze.

  4. Test one door, letting the surface cure for 7 days to see if the problem duplicates itself. If this is silicone contamination, it may be impossible to remove the silicone completely.

If your test does not work, stripping is the only answer. We know this is not what you want to hear, but we hope that this insight will help you to achieve your desired end result.

Future forward, when working with a pre-existing finish with no knowledge of previous wood care, always test a hidden area before proceeding with the entire project.

Watch how to power prep existing high-use finishes for stain or paint like kitchen cabinetry here.

Related Categories


Why can't I get a dark stain color on Maple wood using water based wood stain over pre-stain conditioner?

Maple is one of the most difficult woods to achieve a dark, uniform stain color on because it is a dense, closed grain wood and often absorbs stain very unevenly. General Finishes Gel Stains or Water Based Stains usually will perform very well because they are more topical than traditional liquid oil stains, and contain more colorants. 

We do not recommend pre-sealing Maple with a conditioner because it closes up the grain of the wood even more, further preventing color adherence. In the future, just use our water-based stains or gel stains on their own. Do not use liquid oil-based stains on Maple because they will blotch.

Also, prep sand Maple with 120 grit, followed by 150 grit or 220 grit. 

Related Categories


*How Do I Prevent Light Colored Paint from Yellowing When Applying Water Based Topcoat?

All bright white paint will yellow slightly with time, even without topcoat. You have probably tried to touch up white woodwork in your home after several years and noticed that the new paint is brighter.

But white and light paints can react if clear coated with a waterbased finish; water-based topcoats are reactive and may draw out substances in the wood such as tannins, dyes or unknown substances in existing finishes causing the topcoat to yellow. This is an industry-wide issue and can happen right away, years later or never.

There is no way to reliably predict yellowing ahead of time. Every existing finish is different and we rarely know the finishing provenance on a previously finished piece. Every tree is different; every piece of wood is unique. Wood can bleed tannins immediately after the topcoat dries or months later with a change in temperature that comes with a change in seasons. Oak, pine, mahogany, and Douglas Fir are particularly prone to bleed-through.

Throughout all of our testing, General Finishes water-based topcoats are clear drying over a non-reactive substrate such as plastic or metal but when applied to something as unpredictable as wood, it is best to play it safe.

To reduce the occurrence of yellowing, we formulated Stain Blocker, a chemical stain and tannin blocking primer, and Brushable White Enamel. But the safest route is no use of topcoat over whites and light paint. As all of our white pigmented paints are self-sealing and do not require a topcoat, we warn users as follows:

CAUTION: Do NOT use any water-based clear coat over bright whites such as GF Snow White Milk Paint, or GF White Poly as it may cause yellowing. Lighter-colored paints may alter slightly with a topcoat application, but the color shift is less noticeable. Any clear coat can become reactive over wood substrates or existing finishes, causing tannin or dye bleed-though regardless of priming. All of GF's white paints do NOT require a topcoat.

TIPS FOR PROTECTING YOURSELF AND PREVENTING YELLOWING

  1. Don't apply any clear coat when using light or white paints. Topcoat is perfectly fine over darker colors.
  2. Always prime white paint with a paint system: Gf recommends either 2 coats of Stain Blocker or White Undercoat.
    • Over raw wood: Apply two coats of Stain Blocker or Enduro White Undercoat, then 1-2 coats of Brushable White Enamel, White Poly (spray only), or Milk Paint.
    • Over an existing finish: Apply two coats of Stain Blocker, then 1-2 coats of Brushable White Enamel, White Poly (spray only), or Milk Paint. Always let any primer dry overnight. Many primers suggest a 3-hour dry time and that is not enough.
  3. We offer three types of self-sealing pigmented paint.
    • Milk Paint: A clear topcoat is not required on our Milk Paint for increased durability. It is a self-sealing, exterior rated coating with very high-performance properties. However, higher sheen topcoats provide a smoother surface that is easier to clean for high use projects such as tabletops and kitchen cabinets. Topcoat is fine for darker colors, but not for light or white Milk Paint. In those cases, use Brushable White Enamel (available in Satin or Semigloss) or spray our pigmented White Poly (available in Flat Satin or Semigloss.)
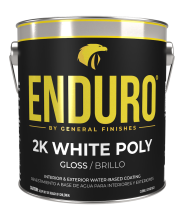
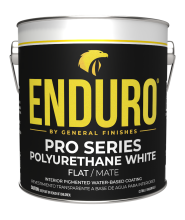
    • Enduro White Poly: Use a professional sprayable "white coat" such as our professional Enduro White Poly. It is a white paint with "increased topcoat properties", is a stand-alone finish when 3 coats are applied and does not require sealing with a topcoat.
    • Brushable White Enamel was developed as a stand-alone finish for those who want a bright white but do not use spray equipment.
  4. Use disclaimers in your contracts. Upcharge for the extra coats needed and never guarantee a white finish over a piece when the customer wants a topcoat. Here is a suggestion for your contracts: 

    Terms of Agreement and Warranties: ________ (Initials) I have been informed that more coats are required when painting with bright whites, reds, greens or yellows. I understand that white paint can yellow over time and water-based topcoats can react with the substrate or existing finish under white paints causing yellowing, even if a stain-blocking primer is used. I have been informed that topcoat over white or light paints should NOT be used.
  5. Always test your project's ENTIRE finishing schedule (from cleaning to topcoat) on an inside door or a more hidden area of the piece. This does not help if the yellowing occurs later but you will at least know if there is an immediate problem.
  6. If you are working on period pieces such as a 1940's serpentine mahogany desk which were often finished in stain containing aniline dyes that cast a pinkish bleed-through under light paint, stay away from light colors. Not every piece of furniture is suitable for up-cycling with a light paint color. Pine, Mahogany, and furniture of the 1940's and 50's are a red flag.
  7. Last, not all manufacturer's topcoats are compatible with other finishes and may react with a color change. Always follow best practices by not rushing, and testing to your satisfaction first.

WHAT YOU NEED TO KNOW ABOUT WHITE PAINT:

  • Bright white paints can yellow over time with or without topcoat. It is the nature of oxidation.
  • The underlying finish or wood species can affect the final color of light paint.
  • Details and inside corners are difficult to cover with any paint color, but this property tends to be more noticeable with whites. This is a naturally occurring phenomenon in paint application and does not necessarily constitute a defect in the paint finish or your technique.
  • The more porous the paint (chalk paint vs an acrylic paint), the more likely that yellowing will occur. The topcoat is actually seeping through the spaces caused by the larger particles of filler that give chalk style paints their texture.
  • Whites have a lower “hide” quality and are more transparent than other colors. Most bright whites require additional coats to achieve the desired color and minimize color variation. This can increase the cost of paint finishing. Always include a clause in your contracts addressing the need for additional coats to achieve coverage.

IF YOU ARE A PAINTING PROFESSIONAL, DO NOT CARRY THE COST OF WHITE PAINT YOURSELF

Include the cost of the increased labor for applying white paints with a fair, reasonable up-charge. White paints, even if they did not yellow, require more coats and high-quality primers to achieve coverage. See our video How to Achieve a Bright White Finish that Lasts for more information.

If your white cabinets have yellowed, we recommend prep cleaning and scuff sanding, applying a coat of General Finishes Stain Blocker primer, finish sand and re-coat with another coat of paint.

Watch "How to Get a Bright White Finish" to learn more.

Related Categories


*The Finish On My Cabinets Is Chipping - Can I Cover This Up with Another Coat of Paint?

If your current finish is chipping, it is failing to adhere correctly. The adhesion problem could be caused by several reasons:

  1. Improper preparation: Cleaning an existing finish removes dirt, grime and many common contaminants such as oil from hands. Dirt, grime, and oil prevent good adhesion causing the possibility of chipping, peeling and flaking - all signs of a failed finish.
  2. Contaminants from dusting sprays that contain silicone will also impact the appearance and adherence of a finish - silicone is almost impossible to remove. Oil soaps and wax can also cause adhesion failures.
  3. The previous paint was a "chippy style" paint, such as an original casein-based milk paint that does not contain the necessary resins for high durability.

We would not recommend applying any of our products over a failing finish, because the underlying finish will continue to present adhesion problems.

Your only recourse for a good result is to remove the current finish by stripping and sanding.


Related Categories


*How Do I Remove Brush Strokes from the 3rd Coat of High Performance Polyurethane?

Sand down the final finish with a 220-grit foam sanding pad, and then add another layer of General Finishes High Performance PolyurethaneTopcoat. Apply liberally than you did previously without heavy back-brushing.

Let the topcoat self-level a bit - it will tighten down as it dries.

If it's above 80°F or if the humidity is less than 70% in the space you're working, we recommend adding 10% GF Extender to the topcoat to improve open time.

Watch how to apply a water-based topcoat to a large surface with a paint pad applicator here.

Related Categories


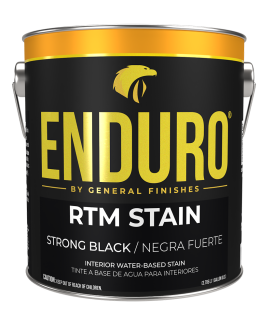
*Why Isn't RTM Stain Adhering to the Wood Grain of My Oak Project?

This problem could be caused by the surface tension of the oak. Surface Tension, sometimes created by sanding, can cause stains to not adhere to the grain of the wood.

You have a few options:

  1. Lightly hand-apply the first coat, then spray (without wiping) a second coat.
  2. Hand-apply stain the first coat. Then tone the piece by applying a mix of 10-15% stain with topcoat.

Related Categories


*How Do I Remove a White Mark Caused By a Vodka Spill?

The term for white or cloudy marks is blush, caused by some type of moisture in the finish. Alcohol damage is more severe than water rings.

General Finishes tests all our topcoats against both isopropyl and denatured alcohol with results showing recovery within an hour.

In most cases, the white mark will fade if the spill is cleaned up in a timely manner. If the alcohol had been sitting on the surface for an extended period then it might not be able to bounce back.

HOW TO REMOVE WHITE MARKS

The afflicted surface needs to be scuffed and sanded first. Second, we recommend applying a sanding sealer to protect the top. Sanding sealer has a larger resin particle, so it will provide a better build for the next sanding step.

Learn more about General Finishes Enduro Sanding Sealer here.

Then finish with your topcoat.

Future forward, if you have a project that receives high-use, a glossier sheen will be more durable. The flatting agents that are required to formulate flat sheens cause a slight loss in durability and water resistance.

If you are set on a flat sheen on a new project, use two coats of semi-gloss first and finish with the flat sheen topcoat.

Related Categories


*How Can I Fix Some Light Scratches on the Surface of My Cabinets?

Touch Up Scratched Cabinets

General Finishes does not think light scratches on a door are so significant that it would be necessary for you to strip down the finish. 

Instead of stripping, GF recommends that you try:

Even though topcoat is included in the mixture with Dye Stain, the surface should be sealed with several coats of stand-alone High Performance.

This information and more can be found in this toning video.

Related Categories


*Why Does GF Milk Paint Look Different When Applied with a Spray Gun Versus a Brush Application?

Milk Paint Color Seperation

Milk Paint is not like a filler-based wall paint. It is engineered for high-use applications such as tabletops and cabinets that require considerably more durability than a wall. The resins that make Milk Paint durable change the properties of it, so you have to handle it differently.

The type of applicator you use will change the thickness of the film and affect the appearance GF Milk Paint.

When refinishing kitchen cabinets, our contractor customers often roll the face frames and spray the doors. If there are any corners or edges that need to be filled in with a brush, they will fill in before spraying or rolling. Then, they will complete the entire section with one type applicator.

With this approach, you will notice a slight difference between the frame and the cabinet door, but the difference is considerably less obvious than it would be if you sprayed and rolled on this same surface. 

Secondly, always stir the can well just BEFORE and DURING use. When working with a large project, we recommend continuing to stir during use to keep color properties consistent. If there is any delay, the ingredients will start separating.

Color separation is a condition that the paint industry calls "float". This is very typical with specific colors such as grays because of the large variance in gravities of the pigments required to create the color. In gray for instance, Ti02 (white) is 3.4 and black is 1.62. The lower density will float. This phenomena will not occur in colors that have less variance in densities.

Related Categories


What Causes Orange Peel When Spraying A Water-Based Product?

Orange Peel while Spraying

Orange peel over a stain application

One of the causes of orange peel is the application of too much fluid and not enough atomization to break the product up into smaller droplets. It's similar to putting your finger over the end of a garden hose. Increase the atomization by using smaller fluid tips or a larger spray unit. See General Finishes comparison chart for generally recommended spray tips. Contact your spray equipment manufacturer's recommendations as well.

Another cause can be temperature. Refinishing furniture in a space that is below or above the 65-75 degrees F range can lead to problems, and a space below 55 degrees F is definitely too cold.


Related Categories


*Why Are My Painted Kitchen Cabinets Cracking in the Corners After Turning Up the Heat - How Can I Fix The Cracking?

Cracking Paint

This issue is caused by a change in humidity in the house when the winter heating season starts. This is a very typical problem when painting over existing finishes. The cracking is a result of expansion and contraction.

When you apply numerous heavy layers of primers, paints, and topcoats, they can crack at the joints or angles when the humidity changes. The cracking occurs when the door panel shrinks and breaks the heavy paint layer.

There are two options when it comes to fixing this problem: 

  • Fill the cracks with painters caulk and reapply the paint and clear coat. 
  • Leave it alone and wait until spring when the cracks will close back up. 

Putting a humidifier in the room may also help close the gaps.

Painting cabinets in the winter is the best way to avoid this problem because there is no humidity. That way when the wood swells up in the hotter months and then shrinks back again in the cooler months, there is minimum cracking or damage. 


Related Categories


Why does Enduro-Var clog up in my spray gun during use?

Enduro-Var sprays beautifully if the gun is absolutely clean and does not have any other finish residue. Proper cleaning with acetone followed with hot water should purge the fluid passage. Enduro-Var itself will not cause gun failure.

Another possibility is the power of the gun. Some of the lower quality guns can overheat causing the product to cure in the gun - they need a rest once in a while if you are using them all day.

Also note that Enduro-Var ADHERES WELL only over WATER STAINS, DYE STAINS, and RAW WOOD.

Related Categories


*How Do I Match Putty Wood Filler to a Dark Stain?

Putty comes in two forms, pre-colored or as a stainable wood filler designed to fill minor imperfection such as nail holes, cracks, and gouges in the wood surface. Putty will display stain a bit differently than wood, so it is not a "perfect" fix, but a good one.

The goal is to get the best possible color match to either the color of the raw wood or the color of your existing finish.

The easiest route is to buy a putty that is pre-mixed with color. Both Famowood and Timbermate make colors of putty in several shades. Famowood is available in both oil-based and water-based formulas. Timbermate is an interior grade water-based filler and comes in 13 pre-mixed colors.

Be careful to note if you are buying a solvent (oil) based putty or a water-based putty. Either will work as long as you observe opposing dry times when switching as you would do for finishes.

DRY TIMES:

  • Water over oil: a minimum of 72 hours
  • Oil over water: a minimum of 24 hours

If you cannot purchase the right color match, you can tint the putty with stain to create a custom color. For example:

TO USE:

  • Prep sand your piece. If you are using with an existing finish, thoroughly prep clean and scuff sand your project first.
  • Press wood filler into defected area.
  • When dry, sand flush with surrounding surfaces after approximately 15-30 minutes, depending on temperature, depth of fill and whether the putty is oil or water based.

Finally, another good putty is Color Putty. They make both water and oil-based versions in ready-made colors. This is a soft putty that can be used AFTER the project is finished to fill nail holes or small imperfections.

ALWAYS TEST filler, stain and finish combinations on a small area before applying to your project.

Related Categories


*I Prep Cleaned My Project with Mineral Spirits But Now I Want to Switch to Water-Based Products. What Should I Clean My Surface with?

Never use mineral spirits to prep clean before applying water-based finishes.

You can correct this problem by cleaning again with a 50/50 mix of denatured alcohol and water.

Let your project dry 24 hours before applying water-based products.

Related Categories


*Troubleshooting Guide for Spraying Water Based Finishes

ROUGH, DRY SURFACE 
This is called dry spray. You may have sprayed too lightly.

Re-sand the finish with 320-grit sandpaper and apply a heavier coat. Keep your gun at 6-8" from the surface.

DIMPLES IN THE FINISH 
This is called orange peel, caused by spraying in temperatures that are too cool. Cooler temperatures will adversely affect how the finish will level and harden. 

Water-based finishes must be applied at temperatures above 65 F. If it is cold enough to wear a sweater it is too cold to apply a water-based finish. 

The surface of the wood must also be warm. If you turn the heat on when you enter your shop in the morning, the air heats up quickly but your furniture will still be cold for some time. Check the surface to see if it is warm. 

Also, check the temperature of the finish. Warming cold finish by setting the can next to a heater or setting the container in some hot water for 5 minutes will improve the ease of application. 

NOTE: Larger dimples are called "fish-eyes" or "craters". Cool temperatures can cause these, but the more likely source is contamination of the finish with either wax or silicone.

BLUSH 
Blush, the term for a cloudy, milky appearance in the finish, has two causes 

1. The most common reason is an incompatible stain. For example, using a water-based topcoat over a heavy oil-based stain. When the top coat is applied, the oil in the stain seeps up through the finish and reacts with the acrylic causing a chemical blush. 

To prevent this,

  • Increase dry times when changing from an oil-based finish to a water based finish.
    • Allow an oil-based finish to dry 72 hours before a water-based finish.
    • Allow a water-based finish to dry 24 hours over an oil-based finish.
  • Use a quick-drying water-based stain. If you choose to use oil based stain, seal the stain with a coat of shellac or lacquer sealer. This will provide a barrier between the oil and the acrylic. Proper drying time between the oil stain and finish coats is essential! The other cause for blushing is high humidity.
  • Spraying water-based finishes in humidities of over 75% may cause blushing because moisture becomes trapped beneath the finish and cannot evaporate. 
    You can prevent this condition by increasing air movement in the finishing area with a fan. All water needs to evaporate is sufficient air movement. You can also improve drying conditions by increasing the temperature in the drying area.

2. The surface is not leveling out. In hot temperatures (85°F - 100°F) the finish may dry too fast. 
Use General Finishes Extender to open (increase) the dry time. Finishes that dry too fast may not completely level out before all the water evaporates from the finish.

Related Categories


*How Do I Remove Water Stains or Discoloration Before Staining Raw Wood?

Sanded oak table with water stain before

You can use oxalic acid when trying to remove discoloration or water damaged spots. The entire surface needs to be treated and then neutralized with a clean water wash.

Mix 4 oz. per quart of warm water. Wipe the entire surface down with the mixture and allow to dry completely. Rinse table with a clean damp rag. Finish sand with 180 grit followed by the final sanding schedule below. Make sure to wear a  dust mask when sanding wood treated with oxalic acid - the dust can irate the nose. 

Lastly, finish sand with the appropriate grit paper:

  • Oil-based products: 150-grit
  • Water-based products: 220-grit

It’s not a bleach but it will brighten the wood back to its original color. 

Related Categories


*How Can I Remove Permanent Marker from My New Water-Based Topcoat Finish?

You can remove the permanent marking using one of the following methods:

  1. General Finishes Orange Oil or WD-40 and #0000 steel wool.
  2. A very small amount of denatured alcohol on a cotton swab
  3. Mr. Clean Magic Eraser

Related Categories


Why Does Flat Out Flat Topcoat Cause Hazing Over Dark Colors?

Hazing or a cloudy appearance can occur when applying a super matte finish over dark colors. In the paint industry, we call this DOI – Distortion of Image. The waxes that give Flat Out Flat its soft feel and the additional matting agents in the formula do not allow light waves to completely refract outward when used over dark colors. Plus, dark colors naturally absorb more light. DOI does occur over light colors, you just can’t see it. Best practice is to always test your finishing schedule before completing the entire project to make sure it meets YOUR satisfaction. The amount of haze on your final project is a personal preference. For example, Flat Out Flat over Lamp Black produces a beautiful dialed-back black, if that’s the look you’re wanting to achieve. 


The increased matting agents used to create the flat look of Flat Out Flat cause it to have less clarity, show fingerprints more and provide slightly less durability than High Performance. It is recommended for low-use projects other than kitchen cabinets and tabletops. For successful use, be sure to thoroughly stir the topcoat before and during use to reincorporate any solids that have settled on the bottom of the can. No more than 3 coats of Flat Out Flat is recommended. More coats will not boost durability. If excessive coats are applied, you increase the chances of your finish getting cloudy due to the high amount of flatting agents contained in Flat Out Flat that are necessary to decrease the sheen. 

If you’ve applied Flat Out Flat and are not happy with the look, you can sand it back very lightly with a 220 foam sanding pad and re-coat with a higher sheen finish. Be sure to not be too aggressive when sanding back. Flat Out Flat will come off fairly easily compared to a higher sheen finish. 

Note: GF has tested Flat Out Flat against other brands of matte topcoats  and it performed with the least hazing. There is always a tradeoff when you are seeking specific properties in a finish

Related Categories


How Do I Remove Watermarks From an Existing Finish?

Sometimes watermarks cannot be removed.

Dark rings are an indication that the watermark is in the wood.

White rings are an indication that the watermark is in the finish.

Possible solutions:

Apply Oxalic Acid mixed 6 oz per quart of water. This can minimize the discoloration but there are no guarantees.

Use bleach is a last resort option. It can remove some rings but may cause a permanent change in the wood.

Your best option is to sand out with 100 grit followed by 120, 150, and then 180. Restain with a darker color.

Related Categories